
Reading Time: 15 minutes
Key Takeaways
- Export in 1080 × 1920
- Use MP4 + H.264
- Match your frame rate
- Export using High Quality
- Upload the original file directly to YouTube
Best CapCut Export Settings for YouTube Shorts (2026 Guide)
Have you ever exported a YouTube Short from CapCut only to find that it looks blurry, pixelated, or less vibrant after uploading? You’re not alone. Many creators spend hours perfecting their edits, only to see the final video lose quality once YouTube finishes processing it.
The good news is that this problem is usually not caused by your camera or editing skills. In most cases, it’s the result of using incorrect export settings. Choosing the right resolution, frame rate, bitrate, video codec, and audio settings can make a noticeable difference in how your Shorts look after YouTube’s compression.
In this complete 2026 guide, you’ll learn the best CapCut export settings for YouTube Shorts, understand why videos lose quality after upload, and discover practical tips to preserve sharp visuals, smooth motion, and clear audio. Whether you edit on the CapCut mobile app or desktop version, these recommendations will help you create professional-looking Shorts that stand out in viewers’ feeds.
We’ve organized this guide into easy-to-follow sections with comparison tables, export checklists, and answers to common creator questions, so you can confidently export every Short using the settings that work best.
Best CapCut Export Settings for YouTube Shorts (Quick Answer)
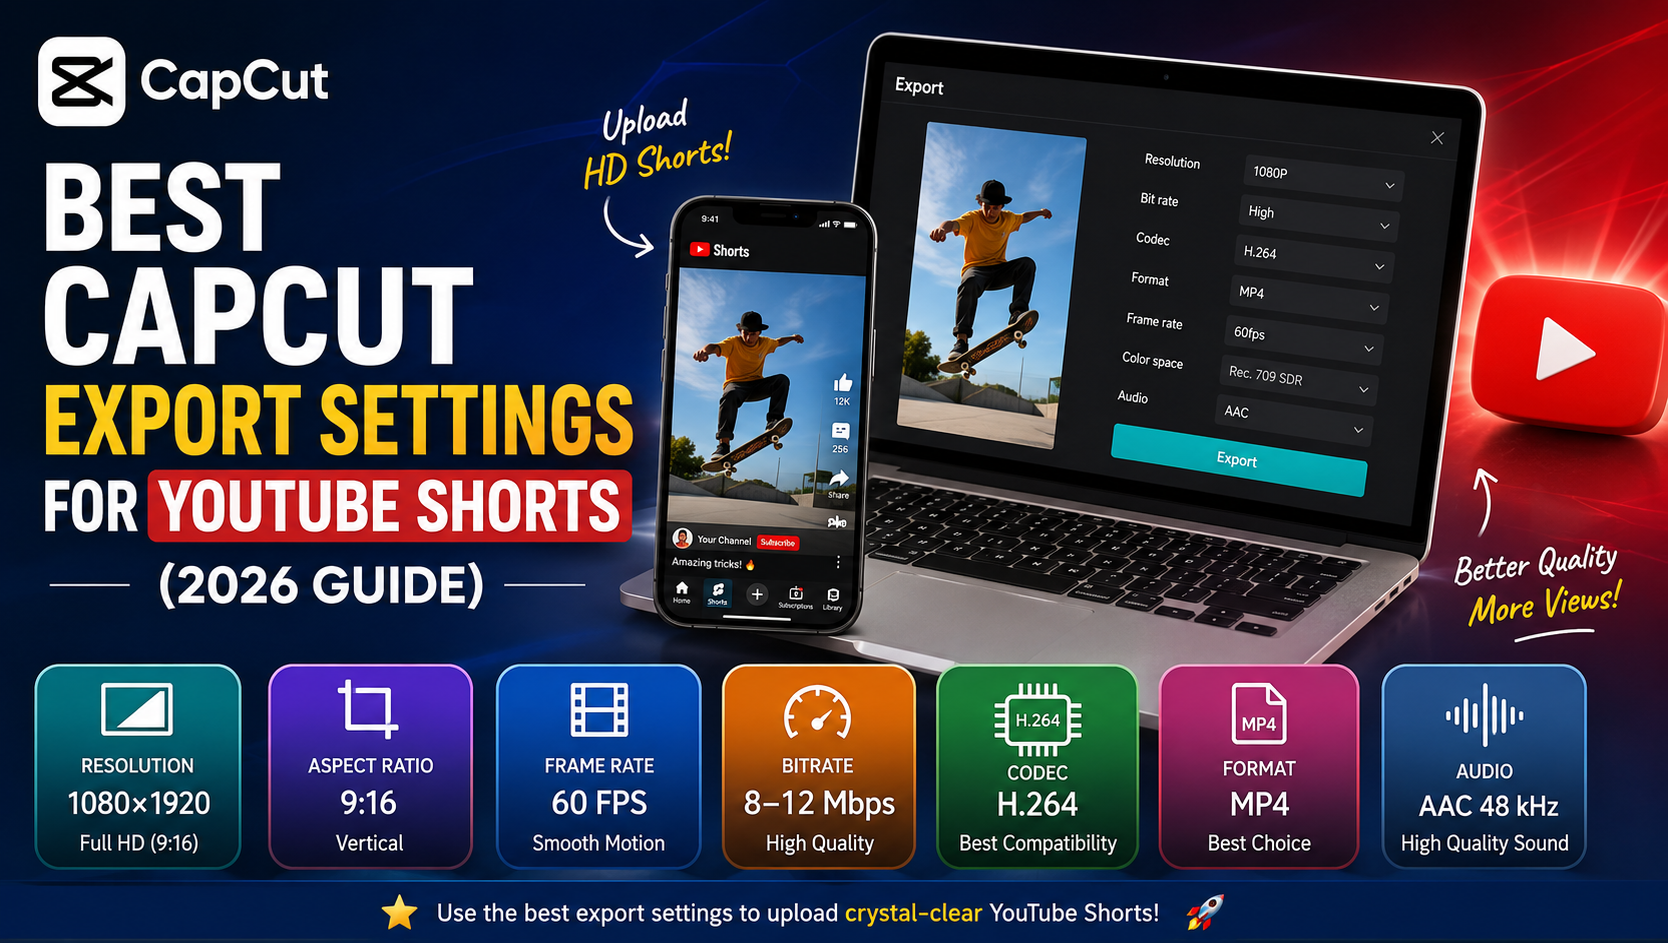
If you’re looking for the best CapCut export settings for YouTube Shorts, use the following configuration for the best balance of video quality, compatibility, and upload speed.
| Setting | Recommended Value |
|---|---|
| Resolution | 1080 × 1920 (Full HD) |
| Aspect Ratio | 9:16 (Vertical) |
| Frame Rate (FPS) | Match your source footage (30 FPS or 60 FPS) |
| Video Format | MP4 |
| Video Codec | H.264 (AVC) |
| Bitrate | High Quality (Approximately 8–12 Mbps for 1080p) |
| Audio Codec | AAC |
| Audio Sample Rate | 48 kHz |
| Audio Channels | Stereo |
| Recommended Video Length | Up to 60 seconds for maximum compatibility |
These settings help preserve image quality before YouTube applies its compression, giving your Shorts the best chance of remaining sharp, smooth, and professional-looking after upload. While YouTube re-encodes every video, exporting with the correct settings minimizes quality loss and creates a better viewing experience across all devices.
Table of Contents
- Why Export Settings Matter
- Why YouTube Shorts Lose Quality
- YouTube Shorts Video Requirements (2026)
- Best Resolution for YouTube Shorts
- Best Aspect Ratio
- Maximum Video Length
- Choosing the Right File Format
- Common Beginner Mistakes
- What’s Coming Next
Why Export Settings Matter for YouTube Shorts
Why YouTube Shorts Lose Quality
Many creators spend hours editing their Shorts with transitions, captions, effects, and color grading, only to see their videos lose quality after uploading. This often happens because YouTube re-encodes every video to optimize streaming across different devices and internet speeds.
If your export settings aren’t optimized, YouTube has less high-quality data to work with, which can lead to:
- Blurry visuals
- Pixelated text
- Softer colors
- Compression artifacts
- Reduced sharpness
- Lower perceived video quality
Using the correct settings ensures that YouTube starts with the best possible source file. Even after compression, your video is more likely to retain its clarity and professional appearance.
CapCut Dark Aesthetic Master Settings: Best CapCut Export Settings for YouTube Shorts (2026 Guide): Upload HD Videos Without Losing Quality
Why Do YouTube Shorts Lose Quality?
One of the most common questions creators ask is:
How YouTube Compresses Every Uploaded Video
Many creators believe exporting in the highest possible quality guarantees the best-looking video. While high-quality exports are important, YouTube still compresses every upload to improve streaming performance.
This compression affects:
- Resolution
- Bitrate
- File size
- Video encoding
- Streaming performance
The goal isn’t to avoid compression—it’s impossible. Instead, your objective is to provide YouTube with a clean, high-quality source file so the compressed version still looks excellent.
Why do my Shorts become blurry after uploading?
The answer lies in YouTube’s processing system. Every uploaded video is compressed to create multiple versions for different devices and connection speeds.
Several factors can make this compression more noticeable:
Low Export Resolution
Exporting at 720p or lower provides YouTube with less visual information, making the final result appear soft or blurry after processing.
Low Bitrate
Bitrate determines how much video data is stored each second. A low bitrate means less detail, which becomes even more apparent after YouTube applies additional compression.
Incorrect Frame Rate
Changing the frame rate during export can introduce motion inconsistencies, especially if it doesn’t match your original footage.
Multiple Compression Cycles
Exporting, uploading to another app, downloading again, and then uploading to YouTube causes repeated compression, reducing overall quality.
Poor Source Footage
Even the best export settings can’t fully compensate for low-quality recordings. Good lighting, stable footage, and proper camera settings are essential.
Why Poor Export Settings Reduce Video Quality
Even if your original footage is recorded in high quality, incorrect export settings can reduce its clarity before it ever reaches YouTube. Choosing a low resolution, exporting with an insufficient bitrate, or changing the original frame rate gives YouTube less visual information to work with during compression. As a result, your final Short may appear blurry, pixelated, or less detailed than it looked inside CapCut. Using the recommended export settings helps preserve more image detail and improves the overall viewing experience.
YouTube Shorts Video Requirements (2026)
Before adjusting CapCut’s export settings, it’s important to understand YouTube’s Shorts recommendations.
Recommended Resolution
The recommended resolution is:
1080 × 1920 pixels
This Full HD vertical format provides excellent image quality while remaining optimized for smartphones, where most Shorts are viewed.
Lower resolutions, such as 720 × 1280, may upload successfully but often result in softer visuals after compression.
Although YouTube can process videos uploaded in lower or higher resolutions, 1080 × 1920 remains the recommended standard for most creators. It delivers excellent visual quality while keeping file sizes manageable, making it the ideal choice for YouTube Shorts.
Best Aspect Ratio
The ideal aspect ratio for YouTube Shorts is:
9:16
This vertical format fills the entire mobile screen, creating an immersive viewing experience.
Although square (1:1) and some other vertical formats can qualify as Shorts, they don’t use the full screen and generally provide a less engaging experience.
Using the correct aspect ratio also helps prevent unwanted cropping or black bars. Since YouTube Shorts are designed for full-screen mobile viewing, exporting in the 9:16 vertical format provides the best viewing experience and makes your content appear more professional.
Maximum Video Length
While YouTube has expanded Shorts to support videos up to three minutes in certain cases, videos of 60 seconds or less remain the most widely recognized and promoted in the Shorts feed.
For the best chance of reaching new viewers, aim to keep your Shorts under one minute unless your content specifically benefits from a longer format.
While longer Shorts are supported in some situations, shorter videos are often easier to watch and can improve viewer retention. Focus on delivering value quickly instead of simply increasing the video’s length.
Supported File Formats
YouTube supports several video formats, but the most reliable choice is:
- MP4
MP4 offers excellent compatibility, efficient compression, and fast processing.
Although formats such as MOV are supported, MP4 remains the preferred choice because it offers broad compatibility, efficient compression, and reliable processing across devices and platforms.
Recommended Video Codec
The preferred codec for most creators is:
H.264
It provides an ideal balance of quality, compatibility, and upload speed.
Although H.265 (HEVC) produces smaller files, H.264 remains the safer choice because it is more widely supported across devices and platforms.
For most YouTube creators, H.264 provides the best balance of quality, compatibility, and processing speed. Unless you have a specific workflow that requires HEVC (H.265), H.264 is the safest option for consistent results.
Best Resolution for YouTube Shorts (1080p vs. 4K)
One of the most frequently asked questions is:
Should I export Shorts in 1080p or 4K?
For nearly every creator, 1080p (1080 × 1920) is the best option.
Why 1080p (1080 × 1920) Is the Best Choice
- Optimized for mobile viewing
- Faster exports
- Smaller file sizes
- Quicker uploads
- Excellent image quality
- Better workflow efficiency
For the majority of creators, 1080p provides the ideal balance between visual quality, rendering speed, upload time, and file size. Since most YouTube Shorts are watched on smartphones, Full HD delivers crisp, detailed visuals without the extra storage and processing demands of 4K exports.
When Should You Export in 4K?
For most YouTube Shorts, 1080 × 1920 (Full HD) is the recommended export resolution because it provides excellent quality, faster exports, and smaller file sizes.
However, exporting in 4K can be beneficial in certain situations, such as:
- You recorded your original footage in 4K and want to preserve as much detail as possible.
- You plan to crop or reframe your video later without losing image quality.
- You’re creating premium content where maximum visual quality is a priority.
- Your workflow or client specifically requires a 4K master file.
Unless you have one of these specific production requirements, exporting in 1080p is the most practical and efficient choice for YouTube Shorts. It delivers excellent visual quality while reducing export time, file size, and upload time.
Recommended Resolution Comparison
| Resolution | Recommended | Quality | Upload Speed |
|---|---|---|---|
| 720 × 1280 | ❌ No | Fair | Fast |
| 1080 × 1920 | ✅ Yes | Excellent | Fast |
| 1440 × 2560 | ⚠ Optional | Excellent | Slower |
| 2160 × 3840 (4K) | ❌ Usually unnecessary | Excellent | Slow |
Expert Recommendation
For most creators, exporting in 1080 × 1920 is the smartest choice. It provides excellent quality, faster exports, smaller file sizes, and smooth uploads while fully meeting YouTube Shorts’ recommended specifications. Unless your workflow specifically benefits from 4K, Full HD remains the best option for everyday content creation.
Common Beginner Mistakes
Avoid these mistakes if you want professional-looking YouTube Shorts:
- Exporting at 720p instead of 1080p.
- Choosing the wrong aspect ratio (such as 16:9).
- Using a low-quality export preset.
- Re-uploading videos that have already been compressed.
- Adding text too close to the screen edges, where YouTube’s interface may cover it.
- Ignoring YouTube’s processing time and judging quality immediately after upload.
Key Takeaways
Before moving to the next section, remember these essential settings:
- Resolution: 1080 × 1920
- Aspect Ratio: 9:16
- Maximum Recommended Length: 60 seconds
- File Format: MP4
- Codec: H.264
These settings provide a strong foundation for creating professional-looking YouTube Shorts with CapCut.
Best Frame Rate for YouTube Shorts (30 FPS vs. 60 FPS)
One of the biggest questions creators ask is:
Complete CapCut Settings Guide: Best CapCut Export Settings for YouTube Shorts (2026 Guide): Upload HD Videos Without Losing QualityShould I export in 30 FPS or 60 FPS?
A frame rate (FPS—Frames Per Second) determines how smooth your video appears. Exporting with the wrong frame rate can cause motion blur, stuttering, or unnecessary file size increasesThe best frame rate depends on how your original video was recorded. Exporting with the same frame rate as your source footage helps preserve smooth motion and prevents unnecessary processing. Changing the frame rate during export can introduce motion artifacts, increase file size, or make movement appear less natural..
When to Use 30 FPS
- Talking-head videos
- Tutorials
- Podcasts
- Beauty videos
- Educational content
- Reviews
- Product demonstrations
Thirty frames per second is more than enough for videos with minimal movement. It also keeps file sizes smaller while maintaining excellent quality.
Thirty frames per second is ideal for videos with slower movement, where smooth motion is less important than efficient file sizes and faster exports. It provides excellent quality for educational, lifestyle, and talking-head content.
When to Use 60 FPS
- Gaming videos
- Sports highlights
- Dance videos
- Travel vlogs
- Action scenes
- Cinematic edits
- Fast transitions
Sixty FPS creates noticeably smoother motion, especially during fast camera movements or quick edits.
Use 60 FPS when your videos include fast camera movement, action scenes, gaming, sports, or cinematic edits. The higher frame rate produces noticeably smoother motion but also increases file size and rendering time.
Pro Tip
Always export using the same frame rate as your original footage. Recording at 30 FPS and exporting at 60 FPS will not create true smoothness—it simply increases processing and may introduce unwanted visual artifacts. Matching the source frame rate delivers the most natural-looking results.
30 FPS vs. 60 FPS Comparison
| Feature | 30 FPS | 60 FPS |
|---|---|---|
| File Size | Smaller | Larger |
| Export Speed | Faster | Slower |
| Motion Smoothness | Excellent | Outstanding |
| Battery Usage | Lower | Higher |
| Best For | Talking videos | Gaming & Action |
| Recommended | ✅ Yes | ✅ Yes (if recorded in 60 FPS) |
Which Frame Rate Should You Choose?
For most YouTube Shorts, both 30 FPS and 60 FPS are excellent choices when they match the original recording. If you’re creating tutorials, reviews, educational videos, or talking-head content, 30 FPS is usually the better option. If your content features fast action, gaming, sports, travel, or cinematic sequences, 60 FPS delivers smoother motion and a more polished viewing experience.
Best Bitrate for YouTube Shorts
Another common question is:
What bitrate should I use for YouTube Shorts?
Bitrate controls how much video information is stored every second. Think of it as the amount of detail your video contains.
Higher bitrate usually means:
- Sharper image
- Better text quality
- Less compression
- Larger file size
Lower bitrate usually means:
- Smaller files
- Faster uploads
- More compression
- Lower image quality
Recommended Bitrate Settings
For Full HD (1080 × 1920):
| Frame Rate | Recommended Bitrate |
|---|---|
| 24–30 FPS | 8 Mbps |
| 48–60 FPS | 12 Mbps |
If you’re using CapCut and don’t see exact Mbps values, simply choose the High quality preset. It typically falls within YouTube’s recommended range.
Why Bitrate Matters
Imagine uploading two identical videos:
- Video A uses a low bitrate.
- Video B uses a high bitrate.
After YouTube compresses both, Video B generally retains more detail because it started with more visual information.
That’s why exporting with an appropriate bitrate is one of the easiest ways to improve the final quality of your Shorts.
H.264 vs. H.265: Which Codec Is Best?
A codec determines how your video is compressed and encoded.
The two most common codecs available in CapCut are:
- H.264 (AVC)
- H.265 (HEVC)
H.264
Advantages:
- Fast exports
- Excellent compatibility
- Faster YouTube processing
- Supported by almost every device
- Ideal for beginners and professionals
Recommended for most YouTube creators.
H.265 (HEVC)
Advantages:
- Smaller file sizes
- Higher compression efficiency
- Great for saving storage space
Disadvantages:
- Longer processing times
- Limited compatibility with some older devices
- No major quality advantage for YouTube Shorts
H.264 vs. H.265 Comparison
| Feature | H.264 | H.265 |
|---|---|---|
| Quality | ⭐⭐⭐⭐⭐ | ⭐⭐⭐⭐⭐ |
| File Size | Medium | Small |
| Upload Speed | Fast | Medium |
| Compatibility | Excellent | Good |
| YouTube Processing | Faster | Slower |
| Recommended | ✅ Yes | Only if needed |
Final Recommendation
For almost every YouTube Shorts creator, H.264 is the best choice.
MP4 vs. MOV
CapCut allows exporting in different file formats.
The two most common are:
- MP4
- MOV
Why MP4 Is Better
MP4 offers:
- Better compatibility
- Faster uploads
- Smaller file sizes
- Smooth playback
- Reliable YouTube processing
MOV files can be larger without offering noticeable quality improvements for Shorts.
Recommendation: Export in MP4.
Best CapCut Filters: Best CapCut Export Settings for YouTube Shorts (2026 Guide): Upload HD Videos Without Losing Quality
Best Audio Settings for YouTube Shorts
Great visuals deserve great audio.
Poor sound quality can reduce watch time and viewer satisfaction.
Recommended Audio Settings
- Codec: AAC
- Sample Rate: 48 kHz
- Channels: Stereo
- Audio Quality: High
These settings provide clean, professional audio that works well with YouTube’s processing.
Recommended CapCut Export Settings
| Setting | Best Option |
|---|---|
| Resolution | 1080 × 1920 |
| Aspect Ratio | 9:16 |
| Format | MP4 |
| Codec | H.264 |
| FPS | Match source (30 or 60) |
| Quality | High |
| Audio Codec | AAC |
| Audio Sample Rate | 48 kHz |
Save this table as a quick reference whenever you export a Short.
How to Export YouTube Shorts in CapCut (Desktop)
Follow these steps to export your project with the best settings:
- Finish editing your video.
- Click Export in the top-right corner.
- Set Resolution to 1080 × 1920.
- Choose 30 FPS or 60 FPS, matching your original footage.
- Select MP4 as the file format.
- Use the H.264 codec (if available).
- Set the Quality to High.
- Confirm your audio settings (AAC, 48 kHz if available).
- Click Export and save the file.
How to Export YouTube Shorts in CapCut (Mobile)
The mobile app makes exporting just as simple:
- Complete your edit.
- Tap the Export button.
- Select 1080p resolution.
- Choose the appropriate frame rate.
- Keep the quality set to High.
- Wait for the export to finish.
- Upload the video directly to YouTube without sending it through other apps that may recompress it.
Before Uploading: Final Export Checklist
Use this checklist to make sure your Short is optimized:
- ✅ Resolution: 1080 × 1920
- ✅ Aspect Ratio: 9:16
- ✅ File Format: MP4
- ✅ Codec: H.264
- ✅ Frame Rate: Match your source footage
- ✅ Bitrate: High (about 8–12 Mbps for 1080p)
- ✅ Audio: AAC, 48 kHz
- ✅ Duration: Ideally 60 seconds or less
Following this checklist helps ensure your video looks as sharp as possible after YouTube processes it.
Common CapCut Export Mistakes That Reduce Video Quality
Even with high-quality footage, a few export mistakes can make your YouTube Shorts look blurry or unprofessional. Avoid these common issues to maximize video quality and viewer engagement.
1. Exporting in 720p Instead of 1080p
Although YouTube accepts 720p uploads, Full HD (1080 × 1920) is the recommended resolution for Shorts. A lower resolution often results in softer visuals after YouTube compresses the video.
Best Practice: Always export at 1080 × 1920.
2. Using the Wrong Aspect Ratio
Many beginners accidentally export videos in a 16:9 landscape format, which leaves black bars or reduces the viewing experience on mobile devices.
Correct Setting: 9:16 (Vertical)
3. Choosing a Low-Quality Export Preset
CapCut’s “Recommended” quality option may not always provide the best results. If possible, select High quality to preserve more detail.
4. Uploading a Video Multiple Times
Every time a video is downloaded and re-uploaded to another app, it may be compressed again. Multiple rounds of compression reduce sharpness and introduce visual artifacts.
Tip: Export once from CapCut and upload the original file directly to YouTube.
5. Ignoring YouTube Processing Time
Many creators think their upload is blurry because they check it immediately after publishing.
In reality, YouTube first processes lower-quality versions before generating the HD version.
Wait a few minutes—or longer for larger files—and then check whether the 1080p version is available.
6. Recording Poor-Quality Source Footage
Export settings can’t fix videos that are already low quality.
Improve your recordings by:
- Using good lighting
- Cleaning your camera lens
- Recording in 1080p or higher
- Keeping your footage steady
- Avoiding excessive digital zoom
Pro Tips for Better-Looking YouTube Shorts
Want your videos to look more professional? Follow these expert tips.
Match Your Export Settings to Your Footage
If you recorded at 30 FPS, export at 30 FPS. If you recorded at 60 FPS, export at 60 FPS. Matching the frame rate avoids unnecessary processing and keeps motion smooth.
Keep Important Elements in Safe Areas
The YouTube Shorts interface displays buttons and captions around the edges of the screen.
Place important text, logos, and graphics toward the center of the frame to prevent them from being covered.
Use High-Contrast Captions
Many viewers watch Shorts with the sound off. Add clear captions using readable fonts and colors that stand out against the background.
Export Only Once
Each additional export introduces another layer of compression. Save your final version and avoid re-exporting whenever possible.
Optimize Your Thumbnail (If Applicable)
Although Shorts often autoplay, a strong thumbnail can still improve click-through rates when viewers browse your channel.
Choose a frame that clearly represents the video and includes minimal, readable text.
Troubleshooting Guide
Why Do My Shorts Become Blurry After Uploading?
Possible causes include:
- Exporting below 1080p
- Low bitrate
- Incorrect frame rate
- Poor lighting during recording
- Viewing the video before YouTube finishes HD processing
Solution: Export in 1080 × 1920, use a High quality setting, and wait for YouTube to complete processing.
Does YouTube Reduce Video Quality?
Yes. Every uploaded video is compressed to optimize streaming.
You can’t stop YouTube from compressing videos, but you can minimize quality loss by exporting with the recommended settings covered in this guide.
Should I Export Shorts in 1080p or 4K?
For most creators, 1080p (1080 × 1920) is the better choice.
It offers excellent quality, smaller file sizes, faster rendering, and is well-suited to the way YouTube Shorts are viewed on mobile devices.
Which Codec Is Best for YouTube Shorts?
H.264 is the recommended codec because it combines excellent quality, wide compatibility, and faster processing on YouTube.
YouTube Shorts Tips: Best CapCut Export Settings for YouTube Shorts (2026 Guide): Upload HD Videos Without Losing Quality
Best Bitrate for YouTube Shorts (CapCut Export Guide)
Best Bitrate for YouTube Shorts (CapCut Export Guide)
One of the most common questions creators ask is:
What bitrate should I use for YouTube Shorts?
Bitrate determines how much video data is stored every second of your export. In simple terms, it controls how much detail your video retains. A higher bitrate generally preserves more visual information, resulting in sharper images, cleaner text, and fewer compression artifacts after your video is uploaded to YouTube.
Although YouTube compresses every uploaded video, starting with the right bitrate gives the platform a higher-quality source file to process. This helps minimize quality loss and ensures your Shorts look as crisp and professional as possible.
What Happens with a Higher Bitrate?
Using a higher bitrate provides several advantages:
- Preserves finer image details
- Produces sharper text and graphics
- Reduces visible compression artifacts
- Maintains better color accuracy
- Delivers a more professional-looking final video
The trade-off is that higher bitrate exports create larger file sizes and may take slightly longer to export and upload.
What Happens with a Lower Bitrate?
A lower bitrate reduces the amount of information stored in your video, which can lead to:
- Softer image quality
- Blurry or pixelated details
- Reduced sharpness
- More noticeable compression after uploading
- Smaller file sizes and faster uploads
While smaller files may upload more quickly, the loss in visual quality is often noticeable, especially after YouTube applies its own compression.
Recommended Bitrate Settings for 1080p YouTube Shorts
If you’re exporting your Shorts in 1080 × 1920 (Full HD), use the following bitrate recommendations:
| Frame Rate | Recommended Bitrate |
|---|---|
| 24–30 FPS | Around 8 Mbps |
| 48–60 FPS | Around 12 Mbps |
These values provide an excellent balance between image quality, file size, and upload speed.
If your version of CapCut doesn’t display manual bitrate settings, simply choose the High Quality export preset. In most cases, CapCut automatically selects a bitrate that falls within YouTube’s recommended range for Full HD videos.
Why Bitrate Matters for YouTube Shorts
Imagine exporting two identical videos using different bitrate settings.
- Video A is exported with a low bitrate.
- Video B is exported with a high bitrate.
After YouTube compresses both files, Video B will usually retain more detail because it started with more visual information. Text appears sharper, colors remain cleaner, and compression artifacts are less noticeable.
However, bitrate is only one part of achieving great video quality. If your original recording is poorly lit, shaky, or captured at a low resolution, increasing the bitrate cannot restore lost detail. For the best results, combine the recommended bitrate with high-quality source footage, the correct resolution, and the appropriate frame rate.
Expert Recommendation
For most creators exporting YouTube Shorts in 1080 × 1920, a bitrate of approximately 8 Mbps for 30 FPS and 12 Mbps for 60 FPS provides the ideal balance between quality and file size.
If you’re using CapCut on mobile or desktop and only see quality presets instead of manual bitrate controls, select High Quality. This is the safest option for maintaining excellent visual quality while keeping your workflow simple.
Quick Bitrate Tips
Keep these best practices in mind whenever you export a YouTube Short:
- Export at 1080 × 1920 resolution.
- Match the bitrate to your frame rate whenever possible.
- Choose High Quality if manual bitrate controls aren’t available.
- Avoid exporting the same project multiple times, as repeated compression can reduce image quality.
- Upload your original exported file directly to YouTube instead of sending it through apps that may compress it again.
Using the correct bitrate is one of the simplest ways to improve the final appearance of your YouTube Shorts. Combined with the right resolution, frame rate, codec, and audio settings, it helps ensure your videos remain sharp, clear, and professional after YouTube finishes processing them.
Is H.265 Better Than H.264?
H.264 vs. H.265: Which Codec Is Best for YouTube Shorts?
When exporting a video from CapCut, you’ll often see different codec options, with H.264 (AVC) and H.265 (HEVC) being the most common. Choosing the right codec can affect your file size, compatibility, export speed, and even how smoothly YouTube processes your upload.
What Is a Video Codec?
A video codec is a technology that compresses and stores video files. It reduces file size while preserving as much visual quality as possible.
The two codecs most creators use are:
- H.264 (AVC) – The industry standard, offering excellent compatibility and reliable performance.
- H.265 (HEVC) – A newer codec that compresses files more efficiently, producing smaller file sizes while maintaining similar image quality.
H.264 (AVC)
H.264 remains the best choice for most YouTube Shorts creators because it offers the ideal balance between quality, compatibility, and processing speed.
Advantages of H.264
- Excellent compatibility with almost all devices and platforms
- Faster export and upload times
- Smooth YouTube processing
- Reliable playback on older and newer devices
- Widely supported by video editing software
Disadvantages of H.264
- Larger file sizes compared to H.265
- Slightly less efficient compression
H.265 (HEVC)
H.265 is a newer compression standard that can reduce file size without significantly lowering visual quality.
Advantages of H.265
- Smaller file sizes
- More efficient video compression
- Useful for saving storage space
- Suitable for high-resolution videos
Disadvantages of H.265
- Longer export and processing times
- Not supported by some older devices and software
- Offers little practical advantage for most YouTube Shorts uploads
H.264 vs. H.265 Comparison
| Feature | H.264 (AVC) | H.265 (HEVC) |
|---|---|---|
| Image Quality | Excellent | Excellent |
| File Size | Medium | Smaller |
| Compression Efficiency | Good | Better |
| Export Speed | Faster | Slightly Slower |
| Device Compatibility | Excellent | Good |
| YouTube Processing | Faster | Slightly Slower |
| Best for Beginners | ✅ Yes | ⚠️ Not Always |
| Recommended for YouTube Shorts | ✅ Yes | Only in specific situations |
Which Codec Should You Choose?
For almost every YouTube Shorts creator, H.264 is the recommended option.
It delivers excellent image quality, works on nearly every device, and allows YouTube to process uploads efficiently. Unless you have a specific workflow that requires smaller file sizes or you’re working with advanced production projects, H.264 is the safer and more reliable choice.
Expert Recommendation
If your goal is to create high-quality YouTube Shorts with the fewest compatibility issues, export your videos using:
- Codec: H.264 (AVC)
- Format: MP4
- Resolution: 1080 × 1920
- Frame Rate: Match your source footage
- Quality: High
This combination provides the best balance between image quality, upload speed, and compatibility while following YouTube’s recommended practices.
Quick Tips
- Use H.264 for almost all YouTube Shorts.
- Choose H.265 only if you specifically need smaller file sizes.
- If you’re unsure which codec to select, choose H.264.
- Pair H.264 with the MP4 format for the most reliable results.
MP4 vs. MOV: Which File Format Is Better for YouTube Shorts?
When exporting a YouTube Short from CapCut, you’ll usually have the option to save your video as MP4 or MOV. While both formats are supported by YouTube, choosing the right one can improve compatibility, upload speed, and your overall editing workflow.
What Is MP4?
MP4 is the most widely used video format in the world. It combines excellent video quality with efficient compression, resulting in smaller file sizes that are easy to upload, share, and store.
Advantages of MP4
- Excellent compatibility with YouTube and other social media platforms
- Smaller file sizes without noticeable quality loss
- Faster uploads and processing
- Smooth playback on almost all devices
- Supported by nearly every video editing application
Disadvantages of MP4
- Slightly lower compression efficiency than some newer formats
- Limited support for advanced professional editing features
What Is MOV?
MOV is a video format developed by Apple and is commonly used in professional video production. It can preserve high-quality video and supports advanced editing workflows, but it usually creates larger files.
Advantages of MOV
- Excellent image quality
- Supports professional editing workflows
- Compatible with Apple devices and software
- Suitable for high-end video production
Disadvantages of MOV
- Larger file sizes
- Slower uploads
- Longer processing times
- Less practical for everyday YouTube Shorts creation
MP4 vs. MOV Comparison
| FeatureMP4MOV | ||
|---|---|---|
| Video Quality | Excellent | Excellent |
| File Size | Smaller | Larger |
| Upload Speed | Faster | Slower |
| YouTube Compatibility | Excellent | Excellent |
| Device Compatibility | Excellent | Very Good |
| Best for Daily Content | ✅ Yes | ⚠️ Sometimes |
| Recommended for YouTube Shorts | ✅ Yes | Only if Required |
Which File Format Should You Choose?
For the vast majority of creators, MP4 is the best file format for YouTube Shorts.
It offers outstanding compatibility, smaller file sizes, and faster uploads while maintaining excellent image quality. Since YouTube is optimized to handle MP4 files efficiently, it’s the safest and most reliable choice for both beginners and experienced creators.
MOV can still be useful if you’re working on professional projects, editing within the Apple ecosystem, or following a production workflow that specifically requires it. However, for standard YouTube Shorts, it doesn’t provide a meaningful advantage over MP4.
Expert Recommendation
For the best balance of quality, compatibility, and upload speed, export your YouTube Shorts using:
- File Format: MP4
- Codec: H.264
- Resolution: 1080 × 1920
- Frame Rate: Match your source footage
- Quality: High
This combination follows YouTube’s recommended practices and helps preserve video quality after compression.
Quick Tips
- Choose MP4 for almost every YouTube Shorts export.
- Use MOV only if your editing workflow specifically requires it.
- Pair MP4 with the H.264 codec for maximum compatibility.
- Upload the original exported file directly to YouTube to avoid unnecessary recompression.
In almost every situation, MP4 remains the recommended file format for YouTube Shorts, providing the ideal balance of quality, performance, and reliability.
MP4 vs. MOV: Which File Format Is Better for YouTube Shorts?
When exporting a YouTube Short from CapCut, you’ll usually have the option to save your video as MP4 or MOV. While both formats are supported by YouTube, choosing the right one can improve compatibility, upload speed, and your overall editing workflow.
What Is MP4?
MP4 is the most widely used video format in the world. It combines excellent video quality with efficient compression, resulting in smaller file sizes that are easy to upload, share, and store.
Advantages of MP4
- Excellent compatibility with YouTube and other social media platforms
- Smaller file sizes without noticeable quality loss
- Faster uploads and processing
- Smooth playback on almost all devices
- Supported by nearly every video editing application
Disadvantages of MP4
- Slightly lower compression efficiency than some newer formats
- Limited support for advanced professional editing features
What Is MOV?
MOV is a video format developed by Apple and is commonly used in professional video production. It can preserve high-quality video and supports advanced editing workflows, but it usually creates larger files.
Advantages of MOV
- Excellent image quality
- Supports professional editing workflows
- Compatible with Apple devices and software
- Suitable for high-end video production
Disadvantages of MOV
- Larger file sizes
- Slower uploads
- Longer processing times
- Less practical for everyday YouTube Shorts creation
MP4 vs. MOV Comparison
| Feature | MP4 | MOV |
|---|---|---|
| Video Quality | Excellent | Excellent |
| File Size | Smaller | Larger |
| Upload Speed | Faster | Slower |
| YouTube Compatibility | Excellent | Excellent |
| Device Compatibility | Excellent | Very Good |
| Best for Daily Content | ✅ Yes | ⚠️ Sometimes |
| Recommended for YouTube Shorts | ✅ Yes | Only if Required |
Which File Format Should You Choose?
For the vast majority of creators, MP4 is the best file format for YouTube Shorts.
It offers outstanding compatibility, smaller file sizes, and faster uploads while maintaining excellent image quality. Since YouTube is optimized to handle MP4 files efficiently, it’s the safest and most reliable choice for both beginners and experienced creators.
MOV can still be useful if you’re working on professional projects, editing within the Apple ecosystem, or following a production workflow that specifically requires it. However, for standard YouTube Shorts, it doesn’t provide a meaningful advantage over MP4.
Expert Recommendation
For the best balance of quality, compatibility, and upload speed, export your YouTube Shorts using:
- File Format: MP4
- Codec: H.264
- Resolution: 1080 × 1920
- Frame Rate: Match your source footage
- Quality: High
This combination follows YouTube’s recommended practices and helps preserve video quality after compression.
Quick Tips
- Choose MP4 for almost every YouTube Shorts export.
- Use MOV only if your editing workflow specifically requires it.
- Pair MP4 with the H.264 codec for maximum compatibility.
- Upload the original exported file directly to YouTube to avoid unnecessary recompression.
In almost every situation, MP4 remains the recommended file format for YouTube Shorts, providing the ideal balance of quality, performance, and reliability.
Best Audio Settings for YouTube Shorts
High-quality visuals are important, but great audio is just as essential. Even if your video looks professional, poor sound quality can reduce viewer retention, lower engagement, and make your content appear less polished. Choosing the correct audio settings in CapCut helps ensure your voice, music, and sound effects remain clear after YouTube processes your upload.
Why Audio Quality Matters
YouTube compresses both video and audio files during upload. Starting with the correct audio settings gives YouTube a better-quality source, helping preserve clarity and reduce unwanted distortion.
Good audio quality offers several benefits:
- Clear voice recordings
- Better background music quality
- Crisp sound effects
- Improved viewer experience
- More professional-looking content
Recommended Audio Settings
For the best balance of quality and compatibility, use the following settings whenever they are available in CapCut.
| Setting | Recommended Value |
|---|---|
| Audio Codec | AAC |
| Sample Rate | 48 kHz |
| Channels | Stereo |
| Audio Quality | High |
These settings are fully compatible with YouTube and provide excellent sound quality for most creators.
AAC vs. Other Audio Codecs
AAC (Advanced Audio Coding) is the recommended audio codec for YouTube Shorts because it delivers excellent sound quality while keeping file sizes relatively small.
Advantages of AAC
- Excellent audio quality
- Efficient compression
- Fast YouTube processing
- Wide compatibility across devices
- Ideal for voiceovers, music, and sound effects
Unless your workflow requires another format, AAC is the best choice for YouTube Shorts.
44.1 kHz vs. 48 kHz Sample Rate
Many creators wonder whether they should use 44.1 kHz or 48 kHz.
Both sample rates work with YouTube, but 48 kHz is the preferred option because it is the standard for video production and is widely used by professional editors and cameras.
| Sample Rate | Best For |
|---|---|
| 44.1 kHz | Music and general audio |
| 48 kHz | Video production and YouTube Shorts ✅ |
If your recording was made at 48 kHz, keep the same sample rate when exporting to avoid unnecessary audio processing.
Mono vs. Stereo
If CapCut allows you to choose audio channels, select Stereo.
Stereo audio creates a wider and more natural listening experience, especially when your videos include background music, ambient sounds, or cinematic effects.
Mono audio is generally suitable only for simple voice recordings where file size is the main concern.
Expert Recommendation
For most YouTube Shorts creators, the ideal audio settings are:
- Audio Codec: AAC
- Sample Rate: 48 kHz
- Channels: Stereo
- Audio Quality: High
These settings provide excellent compatibility, clear sound, and reliable performance after YouTube compresses your video.
Quick Audio Tips
Follow these best practices to improve your audio quality:
- Record in a quiet environment whenever possible.
- Avoid clipping or distorted audio by keeping recording levels balanced.
- Use background music at a lower volume than your voice.
- Export using AAC with a 48 kHz sample rate.
- Listen to your exported file before uploading it to YouTube.
Clear, balanced audio keeps viewers engaged and makes your YouTube Shorts feel more professional. Combined with the recommended video settings, these audio settings help deliver the best possible viewing experience.
Recommended CapCut Export Settings (Complete Reference Table)
If you want the best possible balance of video quality, compatibility, and upload speed, use the settings below whenever you export YouTube Shorts from CapCut.
These recommendations are suitable for both the CapCut Mobile App and CapCut Desktop, and they follow YouTube’s current best practices for vertical short-form videos.
| Setting | Recommended Value | Why It Matters |
|---|---|---|
| Resolution | 1080 × 1920 (Full HD) | Produces sharp, high-quality vertical videos that match YouTube Shorts requirements. |
| Aspect Ratio | 9:16 | Fills the entire mobile screen without black bars or cropping. |
| Frame Rate (FPS) | Match your source footage (30 FPS or 60 FPS) | Preserves smooth motion and prevents unnecessary frame conversion. |
| Video Format | MP4 | Offers the best compatibility with YouTube and faster processing. |
| Video Codec | H.264 (AVC) | Delivers excellent quality with broad device compatibility. |
| Bitrate | High Quality (Approximately 8–12 Mbps for 1080p) | Helps maintain image detail after YouTube compresses the video. |
| Audio Codec | AAC | Produces clear, high-quality audio while remaining fully compatible with YouTube. |
| Sample Rate | 48 kHz | The standard sample rate for video production, providing clean and reliable audio. |
| Audio Channels | Stereo | Creates a wider and more immersive listening experience. |
| Export Quality | High | Preserves maximum detail during the export process. |
| Recommended Video Length | Up to 60 seconds | A practical length for strong viewer retention and broad Shorts compatibility. |
Why These Settings Work
These settings are designed to give YouTube the highest-quality source file before its compression process begins. Although YouTube automatically re-encodes every uploaded video, starting with the correct export settings helps preserve more detail, maintain smoother motion, and reduce visible quality loss.
For most creators, this combination provides the ideal balance between image quality, file size, compatibility, and upload speed.
Save These Settings as Your Default Workflow
If you regularly create YouTube Shorts in CapCut, try using these settings for every export. Keeping your export workflow consistent helps maintain reliable video quality across your channel and reduces the chance of accidentally using incorrect settings.
Once you’ve exported your video, upload the original file directly to YouTube instead of sending it through messaging apps or social media platforms, which may compress the video before it reaches YouTube.
Quick Export Checklist
Before tapping the Export button, make sure the following settings are selected:
- ✅ Resolution: 1080 × 1920
- ✅ Aspect Ratio: 9:16
- ✅ Format: MP4
- ✅ Codec: H.264 (AVC)
- ✅ Frame Rate: Matches your source footage
- ✅ Bitrate: High Quality (Approximately 8–12 Mbps)
- ✅ Audio Codec: AAC
- ✅ Sample Rate: 48 kHz
- ✅ Audio Channels: Stereo
- ✅ Export Quality: High
Following this checklist every time you export can help ensure your YouTube Shorts remain sharp, smooth, and professional after YouTube finishes processing them.
How to Export YouTube Shorts in CapCut
Now that you know the recommended export settings, it’s time to apply them in CapCut. Whether you’re using the desktop version or the mobile app, following the correct export process helps preserve your video’s quality before YouTube compresses it.
The steps below use the settings recommended throughout this guide and are suitable for most YouTube Shorts creators.
How to Export YouTube Shorts in CapCut (Desktop)
Exporting from CapCut Desktop gives you greater control over video quality and export settings. Follow these steps for the best results.
Step 1: Finish Editing Your Video
Before exporting, review your project carefully.
Make sure:
- All clips are in the correct order.
- Text and captions are free of spelling mistakes.
- Music and sound effects are balanced.
- No unwanted blank frames remain.
- Your project uses the 9:16 vertical format.
Taking a few extra moments to review your project can save you from exporting the video again later.
Step 2: Click the Export Button
Once you’re satisfied with your edit, click the Export button in the top-right corner of CapCut Desktop.
This opens the export settings panel where you can adjust your final video quality.
Step 3: Apply the Recommended Export Settings
Use the following settings whenever possible.
| Setting | Recommended Value |
|---|---|
| Resolution | 1080 × 1920 |
| Frame Rate | Match your source footage (30 FPS or 60 FPS) |
| Format | MP4 |
| Codec | H.264 |
| Quality | High |
| Audio | AAC, 48 kHz |
These settings provide the best balance between quality, compatibility, and upload speed.
Step 4: Export Your Video
Click Export and allow CapCut to finish rendering your project.
Avoid using your computer for heavy tasks while exporting, as this may slow down the process on lower-powered systems.
Step 5: Upload the Original File to YouTube
After exporting, upload the original video file directly to YouTube.
Avoid sending the video through messaging apps or social media platforms before uploading, as they often compress videos and reduce image quality.
How to Export YouTube Shorts in CapCut (Mobile)
The CapCut mobile app offers nearly the same export quality as the desktop version when the correct settings are used.
Step 1: Complete Your Edit
Double-check your timeline, captions, effects, and audio before exporting.
Step 2: Tap the Export Button
Tap the Export icon in the upper-right corner of the screen.
CapCut will display the available export settings.
Step 3: Select the Best Export Settings
Choose the following settings whenever possible:
- Resolution: 1080p
- Frame Rate: Match your source footage
- Quality: High
- Format: MP4 (if available)
If bitrate settings are not shown, simply choose the High Quality preset.
Step 4: Wait for the Export to Finish
Rendering time depends on:
- Video length
- Number of effects
- Device performance
- Export resolution
Avoid closing CapCut while the export is in progress.
Step 5: Upload Directly to YouTube
For the best quality, upload the exported file directly from your phone to YouTube.
Avoid re-uploading the video through apps that automatically compress media files.
Common Export Mistakes to Avoid
Even with the correct settings, small mistakes can reduce your video’s quality.
Avoid these common issues:
- Exporting at 720p instead of 1080p
- Using the wrong aspect ratio (16:9 instead of 9:16)
- Exporting at a different frame rate than the original recording
- Choosing a low-quality export preset
- Uploading a video that has already been compressed by another app
- Judging video quality before YouTube finishes HD processing
Avoiding these mistakes can significantly improve how your Shorts appear after upload.
Pro Tips for Better Export Quality
Use these professional tips to maximize your final video quality:
- Always export the final version only once.
- Record your footage in good lighting.
- Clean your camera lens before filming.
- Match your export frame rate to your original recording.
- Keep important text away from the screen edges.
- Use the High Quality export preset whenever available.
- Upload the original exported file directly to YouTube.
Small improvements throughout your workflow often make a noticeable difference in the final result.
How Long Does Exporting Take?
Export time varies depending on your device and project.
Typical export times are:
| Video Length | Average Export Time |
|---|---|
| 15–30 seconds | Less than 30 seconds |
| 30–60 seconds | Around 30–60 seconds |
| 1–3 minutes | 1–3 minutes |
Projects with multiple effects, AI features, or high frame rates may take longer to render.
What If Some Export Settings Are Missing?
Depending on your version of CapCut, operating system, or device, you may not see every export option mentioned in this guide.
If manual settings aren’t available:
- Choose the High Quality preset.
- Export at 1080p whenever possible.
- Match the frame rate to your original footage.
- Keep the default codec and audio settings unless you have a specific reason to change them.
CapCut automatically applies suitable settings in many situations, making the High Quality preset the best choice for most creators.
By following these export steps and best practices, you’ll consistently produce YouTube Shorts that look sharper, upload faster, and maintain better quality after YouTube’s compression process.
Troubleshooting Common CapCut Export Problems
Even when you use the recommended export settings, you may occasionally run into issues after exporting or uploading your YouTube Shorts. The good news is that most of these problems are easy to fix once you understand their cause.
Use the troubleshooting guide below to identify common export issues and learn the best solutions.
Why Do My YouTube Shorts Look Blurry?
Blurry videos are one of the most common complaints among creators. In most cases, the problem isn’t CapCut—it’s YouTube’s compression process or incorrect export settings.
Possible Causes
- Exporting below 1080 × 1920
- Using a low-quality export preset
- Low bitrate
- Poor lighting in the original footage
- Viewing the video before YouTube finishes HD processing
How to Fix It
- Export at 1080 × 1920 (Full HD).
- Select the High Quality export preset.
- Use the H.264 codec and MP4 format.
- Wait until YouTube finishes processing the HD version before judging the quality.
- Upload the original exported file directly to YouTube.
Why Is My Export Taking So Long?
Export time depends on several factors and may vary from one project to another.
Possible Causes
- Long videos
- High frame rates (60 FPS)
- Multiple effects or transitions
- AI-powered editing features
- Limited device performance
How to Speed Up Exporting
- Close unnecessary apps while exporting.
- Restart CapCut before exporting large projects.
- Keep enough free storage on your device.
- Export only after completing all edits to avoid repeated rendering.
Why Is My Export File So Large?
A larger file size is usually a sign that your video is being exported in high quality.
Possible Causes
- High bitrate
- 60 FPS exports
- Long video duration
- Numerous effects or overlays
How to Reduce File Size
- Export in 1080 × 1920 instead of 4K.
- Use 30 FPS for slower-paced videos.
- Trim unnecessary clips before exporting.
- Keep the High Quality preset instead of selecting unnecessarily high settings.
Why Is There No Audio After Exporting?
If your exported video has no sound, the issue is often related to muted tracks or export settings.
Possible Causes
- Audio track muted
- Volume set to zero
- Corrupted source file
- Export interrupted before completion
How to Fix It
- Check that all audio tracks are enabled.
- Increase clip and project volume.
- Preview the project before exporting.
- Export the video again after saving your project.
Why Is My Audio Out of Sync?
Audio that doesn’t match the video can make your content feel unprofessional.
Possible Causes
- Damaged source clips
- Heavy editing
- Performance issues during preview
How to Fix It
- Restart CapCut and reopen the project.
- Preview the entire timeline before exporting.
- Export the final project instead of relying on the editing preview.
Why Does CapCut Freeze During Export?
Sometimes CapCut may stop responding or freeze while rendering your project.
Possible Causes
- Insufficient device memory
- Low available storage
- Too many effects in one project
- Outdated CapCut version
How to Fix It
- Close other applications.
- Free up storage space.
- Restart your device.
- Update CapCut to the latest version.
- Export the project again.
Why Can’t I Select 1080p?
Some users notice that the 1080p option is unavailable.
Possible Causes
- Older CapCut version
- Device limitations
- Original footage recorded at a lower resolution
How to Fix It
- Update CapCut to the latest version.
- Record future videos in Full HD whenever possible.
- Choose the highest available resolution if 1080p isn’t offered.
Why Does My Video Look Different After Uploading?
It’s common to notice slight differences after your Short is published.
Possible Causes
- YouTube’s video compression
- HD processing still in progress
- Different screen brightness across devices
How to Fix It
- Wait until YouTube finishes HD processing.
- Compare the original export with the uploaded version after processing is complete.
- Continue using the recommended export settings for the best results.
Quick Troubleshooting Checklist
Before uploading your next YouTube Short, review this checklist:
- ✅ Export at 1080 × 1920.
- ✅ Use the 9:16 aspect ratio.
- ✅ Select the H.264 codec.
- ✅ Save the video as MP4.
- ✅ Match the frame rate to your original footage.
- ✅ Choose the High Quality export preset.
- ✅ Upload the original exported file directly to YouTube.
- ✅ Allow YouTube enough time to finish HD processing.
Following these steps will help you avoid the most common export problems and ensure your YouTube Shorts maintain the best possible quality after upload.
Final Export Checklist for YouTube Shorts
Before you upload your YouTube Short, take a few moments to review your export settings. A simple final check can help you avoid blurry videos, poor audio quality, incorrect aspect ratios, and other common issues that may affect your video’s performance after YouTube processes it.
Use the checklist below every time you export a YouTube Short from CapCut.
Video Settings Checklist
| Setting | Recommended Value | Status |
|---|---|---|
| Resolution | 1080 × 1920 (Full HD) | ✅ |
| Aspect Ratio | 9:16 (Vertical) | ✅ |
| Video Format | MP4 | ✅ |
| Video Codec | H.264 (AVC) | ✅ |
| Frame Rate | Match your source footage (30 FPS or 60 FPS) | ✅ |
| Bitrate | High Quality (Approximately 8–12 Mbps for 1080p) | ✅ |
| Export Quality | High | ✅ |
Audio Settings Checklist
| Setting | Recommended Value | Status |
|---|---|---|
| Audio Codec | AAC | ✅ |
| Sample Rate | 48 kHz | ✅ |
| Audio Channels | Stereo | ✅ |
| Audio Quality | High | ✅ |
Content Checklist
Before exporting, confirm that your project is ready for publishing.
- ✅ All clips are arranged correctly.
- ✅ Captions and on-screen text have been proofread.
- ✅ Important text stays within the safe area.
- ✅ Music and voiceover volumes are balanced.
- ✅ There are no blank frames or unwanted transitions.
- ✅ Your thumbnail or opening frame looks professional.
Upload Checklist
After exporting your video, follow these best practices:
- ✅ Upload the original exported file directly to YouTube.
- ✅ Avoid sending the video through apps that compress media files.
- ✅ Wait until YouTube finishes HD processing before checking quality.
- ✅ Watch your uploaded Short once to confirm that both video and audio play correctly.
- ✅ Double-check your title, description, hashtags, and thumbnail (if applicable) before publishing.
Pro Tip
Save these settings as your standard CapCut export workflow. Using the same high-quality export settings for every YouTube Short helps maintain a consistent look across your channel, reduces editing mistakes, and saves time during future projects.
If you’re unsure about any setting, refer back to the Recommended CapCut Export Settings table earlier in this guide before exporting.
By following this checklist every time, you’ll greatly reduce the chances of blurry uploads, audio issues, or unnecessary quality loss, giving your YouTube Shorts the best possible start before YouTube applies its compression.
Frequently Asked Questions (FAQ)
1. Can I Upload YouTube Shorts Directly from CapCut?
Yes. CapCut allows you to share videos directly to YouTube on supported devices. However, for the best quality and greater control over your upload, it’s generally recommended to export the video first, review it, and then upload the original file manually through the YouTube app or website.
2. Does Exporting in 4K Improve YouTube Shorts Quality?
Not necessarily. Most YouTube Shorts are viewed on smartphones, where 1080 × 1920 (Full HD) already provides excellent quality. Exporting in 4K increases file size and rendering time without offering a significant visual improvement for most creators.
3. Can I Change Export Settings After Exporting a Video?
No. Once a video has been exported, its resolution, frame rate, codec, and bitrate are already encoded into the file. If you need different settings, you’ll have to reopen your CapCut project, adjust the export options, and export the video again.
4. Does YouTube Reduce Audio Quality?
Yes. Just like video, YouTube processes and compresses audio during upload. Using the recommended settings—such as the AAC codec, 48 kHz sample rate, and High audio quality—helps preserve clearer sound after processing.
5. Is 30 FPS Good Enough for YouTube Shorts?
Yes. 30 FPS is an excellent choice for tutorials, educational videos, talking-head content, product reviews, and most everyday Shorts. Use 60 FPS only when your content includes fast motion, gaming, sports, or cinematic action.
6. Why Is My Exported Video Larger Than Expected?
Large file sizes are usually caused by higher quality settings, higher frame rates, longer video durations, or additional visual effects. A larger file often means more image detail is being preserved before YouTube applies compression.
7. Can I Use H.265 (HEVC) Instead of H.264?
Yes, but for most creators, H.264 remains the better option because it offers wider compatibility, faster processing, and reliable performance on YouTube. H.265 is mainly useful if you need smaller file sizes or follow a specific professional workflow.
8. Which Version of CapCut Is Best for Exporting YouTube Shorts?
Both the mobile and desktop versions of CapCut can produce excellent results when using the recommended export settings. The desktop version offers more control over advanced settings, while the mobile app provides a faster and more convenient workflow for everyday editing.
9. Should I Upload the Original Exported File?
Yes. Always upload the original file exported from CapCut. Sending the video through messaging apps, cloud services that recompress media, or social platforms before uploading may reduce image quality.
10. What Are the Best CapCut Export Settings for YouTube Shorts?
For most creators, the recommended settings are:
- Resolution: 1080 × 1920
- Aspect Ratio: 9:16
- Frame Rate: Match your source footage (30 FPS or 60 FPS)
- Video Format: MP4
- Video Codec: H.264
- Bitrate: High Quality (approximately 8–12 Mbps for 1080p)
- Audio Codec: AAC
- Sample Rate: 48 kHz
- Audio Channels: Stereo
These settings provide an excellent balance of image quality, compatibility, and upload speed while helping reduce quality loss after YouTube processes your video.
If you’re still editing your videos, make sure you start with the right project settings. Read our Complete CapCut Settings Guide (2026) to optimize your editing workflow before exporting for YouTube Shorts.
Conclusion
Choosing the best CapCut export settings for YouTube Shorts is one of the easiest ways to improve your video’s quality before it reaches YouTube. While the platform automatically compresses every upload, starting with the correct export settings helps preserve sharp visuals, smooth motion, and clear audio, giving your content the best possible chance to look professional after processing.
For most creators, the ideal export workflow is simple:
- Resolution: 1080 × 1920 (Full HD)
- Aspect Ratio: 9:16
- Video Format: MP4
- Video Codec: H.264 (AVC)
- Frame Rate: Match your source footage (30 FPS or 60 FPS)
- Bitrate: High Quality (approximately 8–12 Mbps for 1080p)
- Audio Codec: AAC
- Sample Rate: 48 kHz
Using these settings consistently will help you avoid common problems such as blurry videos, poor audio quality, incorrect aspect ratios, and unnecessary quality loss after upload.
Remember, export settings are only one part of creating successful YouTube Shorts. High-quality source footage, thoughtful editing, engaging storytelling, and consistent publishing all play an important role in growing your channel and keeping viewers engaged.
If you’re looking to improve your editing skills even further, explore our other CapCut and YouTube creator guides on FacelessAsset.com. You’ll find step-by-step tutorials, editing tips, workflow guides, and practical resources designed to help beginners and experienced creators produce better videos with confidence.
Continue Learning
To build a complete YouTube Shorts workflow, we recommend reading these guides next:
- Complete CapCut Settings Guide (2026) – Learn the best project settings before you start editing.
- CapCut Dark Aesthetic Master Settings (2026) – Create cinematic, high-contrast edits for faceless videos.
- Best CapCut Filters and Effects – Discover creative tools to enhance your videos.
- YouTube Shorts Tips and Tutorials – Learn practical strategies to improve video quality, audience retention, and channel growth.
Whether you’re creating faceless content, tutorials, gaming clips, travel videos, or cinematic edits, mastering your export workflow is a small change that can make a noticeable difference in the final quality of every video you publish.
Thank you for reading this guide. We hope it helps you create sharper, smoother, and more professional YouTube Shorts. Keep experimenting, stay consistent, and continue refining your editing process—because every improvement brings you one step closer to creating content your audience will love.